Showing posts with label Painting. Show all posts

Sunday, January 30, 2011

Dresser Refinishing: Part 4 Painted and Finished

WOOO it's all done! Talk about back breaking work when you're 8 1/2 months pregnant. I wanted to give up so many times throughout the process, especially while painting in the black outlines. I started with the drawers doing freehand, 3 coats. Talk about work! On the straight lines on the actual dresser I thought I'd be smart and use painters tape to make it go super fast and look super straight. Didn't. Work. Out. I was so excited to see the result after it was dry, I peeled back the tape and I about cried! It was all jagged and splotchy! Howwwww? I was so distraught I didn't even take a picture of it to show.

Needless to say, I wrecked my nails scraping the black off of where it shouldn't have been and free handed white over what was still left. It actually turned out really nice after ALL THAT WORK! I'm actually quite proud!

Before and after, what do you think?
dresser_before_after

Ignore my extremely messy kitchen, this dresser took up my whole weekend.
dresser_finished-3

dresser_finished-2

dresser_finished-4

I love how smooth the paint job came out!
dresser_finished-7

Friday, January 28, 2011

Dresser Refinishing: Part 3 Primer

Sanding took a lot longer than I anticipated. Getting into all of those little cracks and crevices was not easy! I spent about six hours yesterday sanding everything to my liking. I tend to get OCD and turn perfectionist when it comes to stuff like this. Most people would have stopped and called it good well before I did. All in all I'm very proud of the result.

Ryan knocked out two coats of primer for me last night, so all I had to do today was sand the primer and paint. I just finished the second coat of paint a minute ago and when that's dry I'll see if we need a third.

Here it is today after two coats of primer and before the paint.

dresser_primer-2

We have decided to reuse the original hardware, they are now a glossy black! I also have a bit of a surprise with the dresser details, a fun little twist. I'm liking it so far.

Tuesday, January 25, 2011

Dresser Refinishing: Part 1 Before

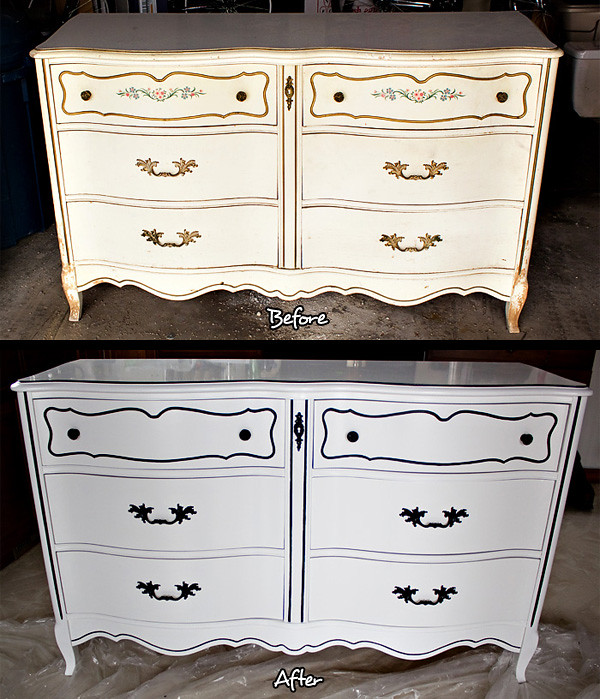
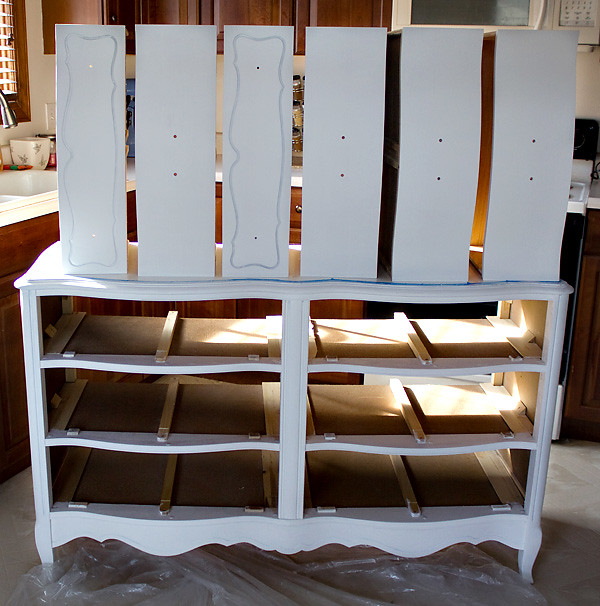
I grabbed a few before pictures of the dresser I've been so excited about. Tonight Ryan is going to sand it down (gotta keep the pregnant lady away from all the dust) and I'm going to prime and paint. We'll be doing the same thing with the rocking chair, but I already posted pictures of that awhile back.

NOTE: Yes, I know my garage needs cleaned like no other! I'll be getting to that this spring! :)

dresser_before-3

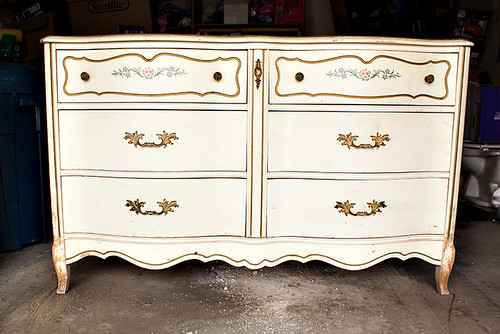
I think my favorite design feature of this dresser is the shape of the bottom. I think this is going to look nice mixed in with the more modern pieces (like the Ikea bookcase) in the room.
dresser_before-1

dresser_before-6
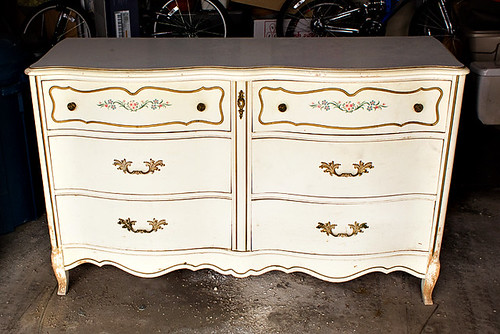
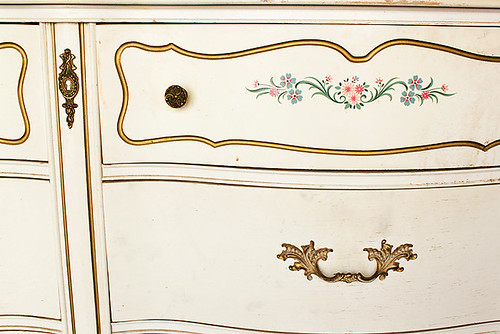
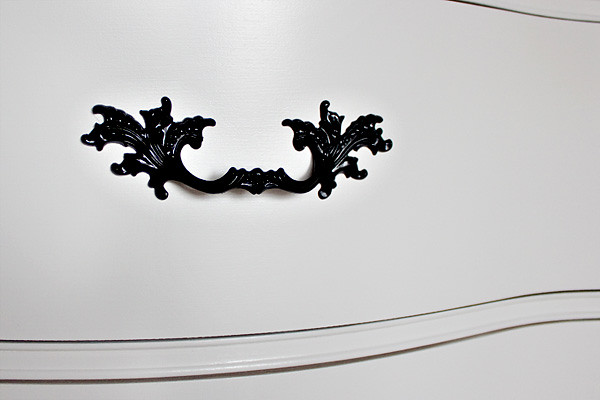
I love all the detail, it's almost a shame I have to repaint it. I really don't think Baby Boy would appreciate the flowers though! I'm still torn as to whether or not I'm going to use the original hardware when we're all done.

dresser_before-8
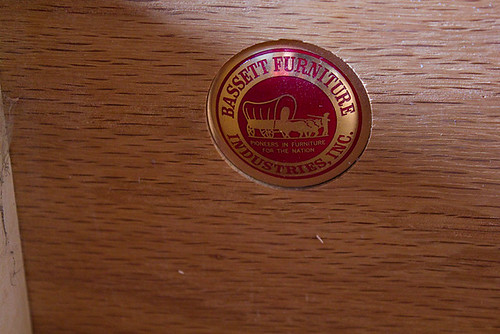
My mom bought this dresser in 1994 as part of a set that included a beautiful canopy bed that's in the same style as the dresser, large mirror that is to be hung above the dresser, two end tables and two antique lamps; for a grand total of $150. They are Bassett Furniture and were made in the mid '60s to reflect the French Provincial style.

This dresser sat out on my grandmas porch for many, many years, hence the worn paint around the bottom on the legs. I think it would have stayed in excellent condition if it had lived inside. I'm shocked at how sturdy and excellent the actual bones of the dresser are still in. It's just the cosmetics like the paint that are in need of some help. She still has the bed and the mirror, but the lamps and end tables are long gone.

Monday, January 17, 2011

Nursery Painting Part 2: AFTER

I reallllly hate what photobucket is doing to my pictures...grrr. okay onto the paint.

***EDIT: I totally forgot I could use my Flickr account (duh!) instead of stupid Photobucket. Now the colors are better!!***

True paint colors:
Photobucket

It was sunny out when I took the before pictures, and overcast in the after. I hope to get better pictures of the after soon.
BEFORE_AFTER
The window wall and the ceiling are a light gray color. We still need to switch out the ceiling fan and put a faceplate over that wiring by the door.

View from the door:
Nursery_Painting-31

View from the door:
Nursery_Painting-32

Nursery_Painting-33

Nursery_Painting-34

Nursery_Painting-35

Nursery_Painting-39

Nursery_Painting-36
Nursery_Painting-38

Now to refinish the dresser and rocking chair and get the other furniture in there!!

Nursery Painting Part 1: BEFORE

**Again, I don't know what Photobucket is doing to the picture quality, they look horrible! For better pics, look on my Facebook.

We finally got started! The pictures are pretty self explanatory, so I'll let them do most of the talking.

Ryan removing the popcorn ceiling. How this was ever considered cool is beyond me!
Nursery_Painting-15

View from the door:
Nursery_Painting-24

View from the door:
Nursery_Painting-22

Nursery_Painting-26

Nursery_Painting-25

Nursery_Painting-29

Nursery_Painting-30

Actual paint post coming soon!